Posts tagged: animation

Video Editor in Linux KDEnlive

comments Comments Off on Video Editor in Linux KDEnlive
By , May 27, 2014 14:52

Kdenlive 0.9.6

Aspettiamo con ansia la versione 1!

Ha superato il test nella creazione basica di video amatoriali.

Unico Software video a permettere l’integrazione dei metadati all’interno dei file ogg.

Spero si specializzi nei formati liberi, cosí da diventare concorrenziale a livello professionale.

Devo ammettere che la gran parte delle volte che il software crasha é per un mio errore, o incaponimento nell’uso  inappropriato di immagini png e jpg.

Adatto alla creazione di brevi clips, ha retto un rendering di 6:30 di video con 4 tracce videoo, animazione frame by frame con png sequence, ogni livello ridimensionato e color corrected, con 20 minuti di rendering.

Niente male!

Un cruccio che ci siamo portati appresso era l’impossibilitá nelle versioni precedenti di fare “reverse speed” che ora é un effetto disponibile per far girare il video al contrario.

MirrorBot Video – Moving Projections Controller Interface

comments Comments Off on MirrorBot Video – Moving Projections Controller Interface
By , January 5, 2011 17:58

YouTube Preview Image

Part #02 of the MirrorBot Demo Video


** Video Installation Audio Visual Special Event n8 @Tacheles 17.12.2010

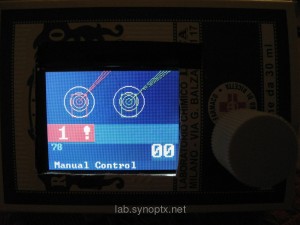
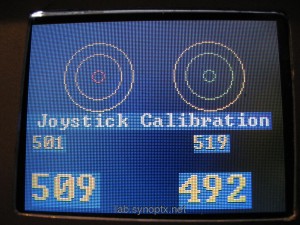
** Details of the Controller device:

  • Programs and Live Mode LCD screen interface

Part #01 of the Video, Installation in MIKZ, Berlin 03.2010: /2011/01/03/mirrorbot-video-moving-projections-in-action

Technical details: lab.synoptx.net/mirrorbot

Blender video editor

comments Comments Off on Blender video editor
By , December 21, 2010 02:56

I m producing a video in Blender so thats my live report, this tutorial will be corrected and make it bigger in the future.

WORKSPACE

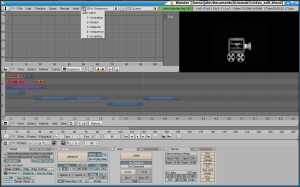
To start lets enter in the windows setup for video editing: drop down menu and choose the number 4th : SEQUENCE

Strange that Blender dont use the standard names, like footage or clip, using strip instead.
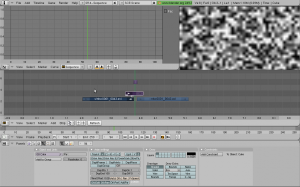
blender video add fxEFFECTS

Select the strips you want to apply the effect to and press spacebar to see appear the menu, then click on

[ADD] -> effect -> Add

That will create a strip that is your effect, with the length of the strips intersection, right above the selected video strips,
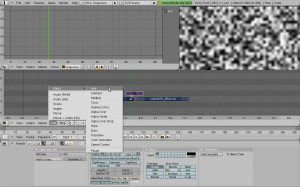
move the mouse around to decide on witch level is positioned.

The effects strip can be resized like any other video strip.

Frequently unfortunally is not possible to add an fx contemporary on 3 strips or more, only 2 strips are aloud.

But there are many effects possibilities and each effect has different setup.
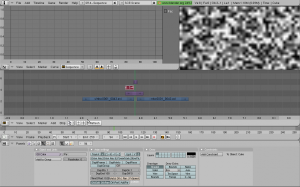
TRANSITIONS

“FADE IN / FADE OUT”
To fade is not so intuitive, but give you the possibility to fade not only to black or white as normal video editor, you choose the background color, so at first
You can use it for fade in and fade out between to clips, ehm Strips in Blender terms, Fade from a strip the first selected to the other, the last selected

Gamma Cross

Add Sequence Strip

select the clips and press (spacebar) -> Gamma Cross

Now you ll need to add a efx strip called
[ Color Generator ]
and then Setup the sequence strip

Color Generator fills the frame with whatever color you select (via a color picker in the buttons window). You can make it black, put it in a channel over your video strip, then select both strips and add a Cross on top of them to dissolve between your strip and the Color Generator. (http://www.thriceberg.com/2010/02/09/editing-with-blenders-vse/)

SHORTCUTs
Remember that the standards shortcut are the first Letter of the action you need.
Frequently in Blender the commands are compressed into 1 shortcut, and not into two different actions.

a -.-.-. it means ALL
select / deselect all clips
In this case what happen clicking A it depends if the strip is already selected or not.

G .-.-..- grab move
move the selected files
for example to move all the strips together: (a) then (g)

C.-.-.-. copy
copy that automatically paste

K is CUT HARD
pratically KUT! coming back on the idea that normally the first letter of a command is a shortcut, is not always like that, but in this case nothing is better then K shortcut, when C is copy combined with CTRL,

mouse usage:
the mouse is sensible to dynamic that means that you click and move the mouse to activate some actions
right click hold press + mouse move it means G (grab / move)

TEXT editing
Drop down menu to enter in model windows setup

ADD (Spacebar) -> text
and then edit Mode to change the text

(http://wiki.blender.org/index.php/Doc:Manual/Modeling/Text)
(http://de.wikibooks.org/wiki/Blender_Dokumentation:_Text)

Rendering FRAMES
press [Render] then press F3 save jpg as

RENDERING VIDEO

“…

In order to render the videos, you have to select the [Do sequence] option right below the [ANIM] in the Scene (F10) menu. The output file(s)

will create in the directory set in the first box of the output group.

By default, blender will render each frame into a separate jpg file, but the output could also be an avi file. To do this, you chose AVI codec in the drop-down list of the format group. In this case, the name of the output avi file will be taken from the text entered in the output box.

For instance, if it says C:\Users\Render\test the output file will be named test0001-0250.avi and created in C:\Users\Render. 0001-0250 reflects the frame range, which of course can be also modified by just entering the desired values for the start and end frames of the animation.

…” ( http://codeanticode.wordpress.com/2008/04/13/using-blender-for-video-editing/ )

Video Editing with Open Source

By , August 14, 2010 11:35

After 4 years in the Open Source scene I m finally able to generate a complete video with Open Source Software.
Was an hard work, many video editors are started but none is complete.
Guys cooperation! please!
Do not try to do only your own stuff, if there are some developer reeding this post, please start to develop Blender features.
YES after my testing, Blender is the best Video Sequence Editor the open market propose:
– stable, Blender dont crash [ if you dont change the CPU usage settings and at the same time rendering (:P) ]
– has many functionality and easy to add FX when you know the technical words that the software use
– Is planned to render, so the dimension of the output has completly individual setup. You can choose between standard formats, but also choose the dimensions of the video in pixels AND the dimensions of the pixel individually, mix up the settings, things that in Kdenlive & co I did not found, there are in Kdenlive many choises between different format and pixel dimensions, no more paranoia about strange web video format, you can make your video with your own custom format
– with particles engine and video texture can be used for post production and compositing like After Effects
– Titles and credits, the text is already editable in EDIT MODE
– Good windows Customization, you can combine the editing windows, but you can choose between 5 view mode in a quick drop down menu, again also the drop down menu has ADD NEW to personalize.

I tought was banal speak abuot Blender video editor but then I have recognize that not all the nerds are informed about, then soon I will post more info about video editing on Blender.

All the other free software I tried have some gap to fill.
There is no chance, I can proudly say
I m a Blender!

Italian article that thinks the same as me:
http://blenderedintorni.blogspot.com/2006/12/situazione-del-video-editing-in-linux.html

Linux gfx Workshops

comments Comments Off on Linux gfx Workshops
By , August 13, 2010 16:36

Linux Works, in cooperation with Bruecken Schlaeger and Synoptx present

graphic design with linux – skillsharing workshops in Berlin!

each Tuesday from 21 September on

in Kreutzigerstr.19 in F’hain in Soned e.V office

starting at 18.00

* migration to linux software

* photo and image editing (GIMP)

* using vector graphic software (Inkscape)

* film animation

* short films, discussions

* and more !

We are looking forward to people who want to come regularly and work on a common project that we will develop together!

The workshop is based on donations.

We will publish what we produce under Creative Commons License.

more info soon on

friedrichshain.homelinux.org

Style to Sell

By , August 12, 2010 15:28

There are some tricks to have “style”

When your graphical production does not look harmonic || professional || complete, you have to work on your sketches and find the main style (like a corporate identity) that represents the project.

Colors & Light
The colors change, based on the ambient light where you watch them, that means  if you want to have a realistic effect on your illustrations you cannot use a warm gray and a cold gray in the same image, in nature that will not happen.
But you can use those gray variants  to create a surreal image for example.
Remember that the colors are influencing the mood, so use them with a meaning.
If you are working on web, search for the standard  colors for similar projects, because the meaning of the colors is really different in the different continents and the meaning changes a bit even between the European countries.

Background
The Background is really boring to make but really important to do.
Empty background is a ZEN solution, white for day, and Black for night. works only in ZEN context.
None color works as a single color in professional illustrations.
If you want to use one tone a good suggestion is to make a material background:
*  take many different white and trow them together on the paper
* take a brush technique and use one color, you will get a single color but with brushes signs, a bit of 3D

Minimize or exaggerate
When something does not convince you, here is the best trick to be used:
* minimize: take it out and delete it, minimize the objects  and the number of images helps to make the structure easier to read and be modeled.
* exaggerate: the other way is to take this not stylish component and repeat it, use it multiple times, even always.
For example you are not sure if a text needs to have a Outline color, you can take out the Outline at all minimize(), or make it fat, stronger color and repeat it for multiple text on the composition (exaggerate).

Harmonia and Elegance
Don’t be afraid, is easy. Everything around you can be represented by math, mathematics as convention to explain the world, Music is math based, and Art too. You can compose your images with math help, use the “guide lines”  to see clearly the position of your object on the page, to calculate the empty spaces … and remember Math,  Geometry, Perspective, Harmonia and Elegance are all the same thing !
z.B. Leonardo Da Vinci
The elegance is into clear lines, so if you use a Vector Program  smooth your lines or draw with a smoother plugin activated:
Inkscape  you can realize this in many ways; for example take the tool ->  [ EDIT PATH BY NODES ]  ; now click on -> [ Make selected nodes symmetric ]
Elegance has few lines, not many particulars, like an Armani suite 😛
Harmonia is based on the cycle of the objects, how and how many times the object is represented.
If there is an object on the left and on the right is empty, that means the emptyness has a meaning, when there is no meaning make full the right side with something that balance the left content.

In history of art the idea of composition is always present, every artist uses a personal way to do it, but many people use the 3,14 rule, go check how the greek temples were built, how Eisenstein decided the video Editing of “Panzerkreuzer Potemkin”, how  Bruno Munari plans his graphics design.

Probably I will be banned from many Graphics websites after this post, because those tricks and tips are the precious knowledge of who work and study ART || GFX

but you know what? lets support and produce Evolution: OPEN SOURCE, OPEN MIND, NOT COMMERCIAL, SHARE ALIKE

Alice Z Bognetti

Small Render Farm or at least a Render Flat

comments Comments Off on Small Render Farm or at least a Render Flat
By , July 31, 2010 13:39

Producing small videos, animations and vjset live as a Freelancer, is easy questioning yourself about building a Render Farm machine to allow to work on huge amount of video data. In my case it will be maximum a Render Flat.

I m Not interested in producing cinema movies, but compositing for shorter projects. I use Blender, but I also use Resolume for vjing, I know how many frames go lost trying to record generated images, or live sets in digital format.

The machine must be cheap for the materials and eco-compatible with low energy consume. What is normally suggested to Do is : Do not spend more then 30% of what you will spend on a true one. A true one will cost a lot – around 30.000€ (Render Stream blog entry) minimum 15.000€, the 30% is between 4500€ and 9.000€

I cannot spend more then 3000€

For Networking TK is using old PIII mother board, but for video… I m afraid with low quality material you realize a machine with the same price of a powerful single computer that can maybe do the same work alone. Lets say I ll start with 8 cpu that will cost around 170€ each one for a total of 1200€ . There is still to calculate the hours of work of the technicians. After you got the case and cables we pass on the softwares, to connect the CPU with a workload management system Condor High Throughput Computing that will optimize the CPU usage, at least for performances, if not for eco-sustainability (but this sofware solution is even too big for my needs) .

The Big Buck Bunny used Sun’s Grid to coordinate average of 150 CPU’s at a time! producing around 4h per frame.

The best links to projects about DIY Render Farm found today: Helmer history (self built machine) this lovely monster is my target a cheap homemade in a great Iron case! he promise “…this machine just costs as much as a better standard PC, but has 24 cores that run each at 2.4 Ghz, a total of 48GB ram, and just needs 400W of power!!” cool explication DIY

MY ABSURDS Idea Considering I m Berlin based will be great to build the machine in horizontal and place it like a pavement on the floor, with a pipeline for ventilation with 2 exits, 1 outside the room and 1 inside the room. That can be a good winter solution to substitute coal heating for cheap rents and let in summer the hot air out

Niklas and Tk suggest both to use a Blender script and Tk seems to be convinced to can use one of our Networks computer, with 2 or 2×2 GHz, but I m speaking about a video-brain, usable for producing different kinds of videos, not an unique Blender output, for example a compositing of stop motion in HD with digital animation. A machine that allows you to promise good quality fast rendering, remember that is a job standalone to render, can even bring specific clients. I believe our 2×2 ghz network machine is enough to start, but in the while you render you will have no much possibility to use the computer otherwise. and you cannot risk to loose some frames for overloading and restart rendering the scene. Anyway is a long time project that can be realized before 2012, nothing now and nothing fast. Is only that I have 1000 projects and Im always in doubt how to invest the money, professional video camera or professional computer? both are around 3000€ Analyzing the market and my clients I ll say our computers are always running and the camera you can rent it for short period.

PONGuino – Arduino & S65 Shield – 2 Player MiniGame

By , February 12, 2010 19:36
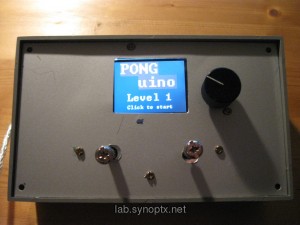
PONGuino game on the MirrorBot v3 Hardware

PONGuino game on the MirrorBot v3 Hardware

I wanted a playable game to show the possibilities of the Arduino plattform in  workshops. Since I already have a S65-Shield built in a box with two joysticks, I wanted to use that MirrorBot hardware for presentation.

The most funny code I could find for the S65 Shield was a Pong game by

www.codetorment.com

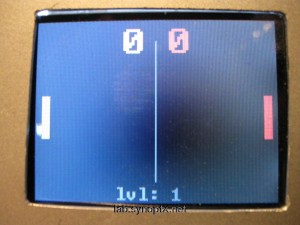
This mod uses one axis of two joysticks – or two potis connected to input pins to move the two bats of the two players up and down.

The AI and encoder codes were removed and replaced by a similar check:

PONGuino 2 players in action

PONGuino 2 players in action

If the joystick potis are moved up or down, they decrease or increase the y position value of the matching bat.

If you have a s65 shield and would like to run this code, you could connect two potis to input pins (e.g. 0,1) and try those. Thes bats ‘should’ move, if you move the pots out of the center position.

I included a veeery simple level system:

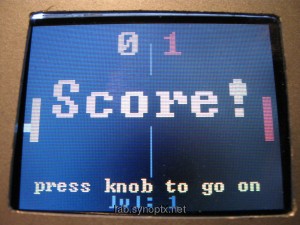
PONGuino someone got a point +

PONGuino someone got a point +

After each round a level int variable gets increased. This level var decreases a delay() (starting at 10 ms)  in the main loop  -that way, so the game gets faster, the more rounds you play ( 5 times).

🙂

….

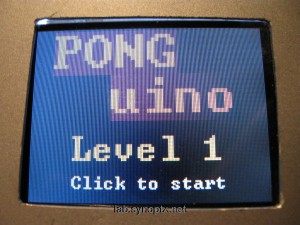
PONGuino mini-game intro screen

PONGuino game intro screen

Continue reading 'PONGuino – Arduino & S65 Shield – 2 Player MiniGame'»

Shields up! Grafix & Color LCD Fun .: S65-Shield

By , January 8, 2010 22:41
S65 Shield italian nosespray pappcarton prototype

S65 Shield italian nosespray pappcarton prototype

We ordered a S65 Arduino shield from Watterott.com.

Simply plug it on a Arduino and play with  a 176 x 132 pixels color display from a Siemens S65 handy, micro SD card slot and rotary encoder.

There is a library on the Watterott website, which contains some graphic functions to paint on the screen, just like in many other languages. This is enough to create small games, animations and GUIs  in full color.

The refresh rate is not soo high, but its fast enough to paint moving objects and interactive animations. The painted pixels stay as they are until something else is drawn over – they do not need to be refreshed.

Testing to paint circles + lines and text on the s65 shield

Testing to paint circles + lines and text

Instead, the screen must be completely cleared before redraw, which is veeeery slow or parts of the screen must be painted over with the background color.

After some experiments, I call the painting functions two times: 1. with the background-color – to overwrite exactly the previously painted lines with the background color, before re-painting moved objects. This approach works fast and the refresh is invisible.

KnowTheKeyboard – Javascript RIA Game

comments Comments Off on KnowTheKeyboard – Javascript RIA Game
By , July 29, 2008 17:06
KnowTheKeyboard Screenshot

KnowTheKeyboard Screenshot

This is an educational Browser Game for Children and Computer Beginners
to learn how to use Keyboard Shortcuts.

The Game is integrated into the TabStarter Easy Launcher
like a RIA Application by using Python gtkmozembed Widget.

It uses Dojo Javascript Library and our synoptx javascript libraries and offline toolkit

Version 0.1 :: (proof of concept)

Level 1 – more Levels coming soon

Level 1: Copy and Paste
Learn to use ctrl + c and ctrl + v

licenced under GPL

Debian Packages

Play online: KnowTheKeyboard Level 1

keys

Play Game!

WordPress Open Source Blog System
SynOptX Lab Theme