Category: Bots

Enable 512MB RAM on latest Raspberry Pi

comments Comments Off on Enable 512MB RAM on latest Raspberry Pi
By , October 19, 2012 20:20

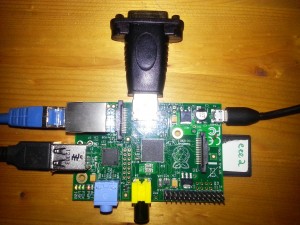
At first I was very disappointed, because my new Raspis showed only 256MB RAM, although the shop promised to deliver the new model with 512MB RAM.

Mr. Watterott answered my email- support request within 5 minutes (!). He told me, that it’s a software issue and pointed me to this link, showing how to identify, if the SoC has 512MB of memory: www.raspberrypi.org/archives/2191

Luckily my boards have a chip with “4G” in the model number 🙂

Shortly after that, I found out, that a new firmware already exists:  www.raspberrypi.org/archives/2180

Update: Those of you lucky enough to receive a 512MB Pi this morning can download updated firmware here. For example, download arm384_start.elf and rename it to start.elf on /boot partition. You will then have a 384M/128M memory split.

Replacing the /boot/start.elf on the SD-card did the trick 😀

Rasperry Pi SPI Touchscreen X-Server

comments Comments Off on Rasperry Pi SPI Touchscreen X-Server
By , October 19, 2012 19:37

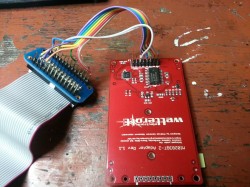
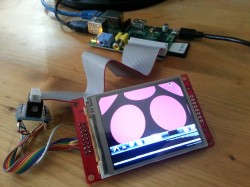
Thanks to Dominique Gallot and vis, I managed to drive a MI0283QT-2 color touchscreen on the raspi 🙂

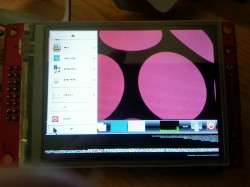
I followed the steps at www.gallot.be/?p=197 and added the framebuffer driver by vis to run X and LXDE-desktop. 40px in vertical are missing and touch is not working yet, but it’s very funny to use a mouse on the mini-screen.

Dominique Gallot’s howto is very accurate, so these are just additional notes to avoid a few catches I noticed:

  1. Install debian –  the Chris boot kernel was not required – the module spidev is already included in the latest debian image
  2. Put this line into /etc/modules:  modprobe spidev bufsiz=256000
  3. Install wiringPi https://projects.drogon.net/raspberry-pi/wiringpi/download-and-install/
  4. Download and compile MI0283QT2-pi
  5. Download the framebuffer driver by vis: https://snr.freifunk.net/trac/vis/browser/raspberrypi/fb.cpp into a subfolder on the same level as MI0283QT2/ and compile it with:                         gcc -lstdc++ -iquote ../MI0283QT2 fb.cpp ../MI0283QT2/MI0283QT2.cpp ../MI0283QT2/font*.c -o fb
  6. Put https://snr.freifunk.net/trac/vis/browser/raspberrypi/10-monitors.conf into /usr/share/X11/xorg.conf.d to set X server resolution to 320×200 px
  7. Unplug HDMI ( / DVI adapter)
  8. Move all USB devices to a powered hub
  9. Use a stroooong 5V usb power supply – a 1000 mAh smartphone plug was not enough
  10. Run these commands from a terminal connected via SSH as root:
gpio load spi
gpio -g mode 18 pwm
gpio -g pwm 18 1000
./fb

start the x-server in a second console:

startx

As you can see in the pictures, the startmenu of LXDE is not really readable and the terminal- fonts are too small, but I’m sure to find some nice applications for this setup.

The gameoflife demo runs very well: its fast and stable. It uses 30-34% CPU

Building instructions

Raspberry Pi Initialization

comments Comments Off on Raspberry Pi Initialization
By , October 18, 2012 20:21

Today I received 2 Raspberry Pi boards from watterott.com – Thanx for the fast delivery!

Specs: www.watterott.com/de/Raspberry-Pi-Model-B

During installation and configuration some bugs appeared, so here are some notes to get around:

I used this debian wheezy image: www.raspberrypi.org/downloads

and followed the linux console install guide elinux.org/RPi_Easy_SD_Card_Setup

At first various problems occurred: locale- and keyboard- config did not work in raspi-config, apt-get dist-upgrade failed to install libgcc1, …

so I changed the dd command to blocksize 1MB and re-installed the SD-card:

dd bs=1M if=~/2012-09-18-wheezy-raspbian.img of=/dev/sdX

Those problems did not disappeared, instead:

  • HDMI to DVI-D(igital) adapter works instantly
  • USB-keyboard and mouse work instantly
  • 1000mAH 5V adapter is strong enough to power the board with keyboard LAN and DVI connected
  • apt-get dist-upgrade works
  • locale- and keyboard- config works in raspi-config
  • LXDE desktop works
  • network and ssh-daemon up and running

Installation of some basic tools:

apt-get install mc screen rcconf tmux

Moving on to some multimedia stuff, I found alsa and sound- modules correctly installed, so I added:

apt-get install mplayer vlc

work in progress…

Raspberry Pi setup

Raspberry Pi setup

Arduino + Touchscreen!

comments Comments Off on Arduino + Touchscreen!
By , June 27, 2012 19:41

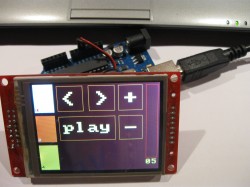
The arduino touchscreen shield by watterott.com :: URL? is great fun. TKilla built:

  • MIDI Controller for VJing and Audio-Studio
  • PONGuino-touch – 2 player touchscreen game
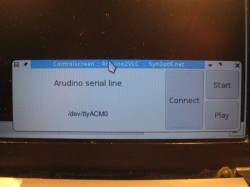
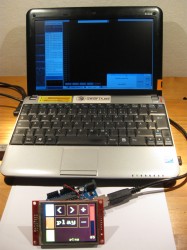
  • PC remote control with mouse- and keyboard- econtrol, VLC mediaplayer control,…
  • various tests/demos

Infos, Code, Videos & more pictures coming soon

CSS gradient background and Mobile browsers

comments Comments Off on CSS gradient background and Mobile browsers
By , May 18, 2011 21:09

While making the layout for a mobile app with the help of jquerymobile, I have questioned myself about the gradient background, for web and mobile.

Looks like the mostly used mobile browser is Opera Mobile – Opera mini,that since the end of 2010 replace “Web (mobile) Browser for S60” the default browser for the mostly sold operative system Symbian OS (originally Nokia propertary made after Open Source!),. Has a stable position with “29.2% of worldwide smartphone market share in 2011” (Wikipedia).

2nd  place is the Android that is increasing users!
3rd place for Iphone with iOS and Safari.
The mobile browsers are born around 1996, in text only mode, around 2006 start the usage of CSS2.1, but the hardware developed so fast that there is no old browser engine to fight with,  thee is just the choice or they cannot show a graphic layout or they render better of your others monitor.
So the list can be restricted to:

/* Safari, Chrome, Skyfire, Nokia Series 60, Polaris, BlackBerry, Android*/
background: -webkit-linear-gradient(bottom, #006353, #c7dad6);

/*Portable Firefox, Firefox Mobile Fennec 1.0 Alpha 3, SeaMonkey Portable 2.0.14*/
background: -moz-linear-gradient( center bottom, rgb(0,98,83) 50%, rgb(0,113,94) 50%, rgb(199,218,214) 99%);

/*Opera Mini & Opera Mobile*/
background: -o-linear-gradient(bottom, #006353, #00715e, #c7dad6);

/*IE mobile */
-msfilter:”progid:DXImageTransform.Microsoft.gradient
(startColorStr=’#81aea7′, EndColorStr=’#81aea7′)”


For the computers Windows XP is always on the top usage, also if Windows 7 is increasing, but with a luck windows user start to leave Internet Explorer that is still on the top but decreasing, followed from Firefox and an increasing number of Chrome users. The fact that IE6 is still there make us brrrrr, IE6 is going down but is anyway counting almost the same users like Safari.
The CSS code for the computer web compatibility is really long:


/* W3C Standard */
background:linear-gradient(bottom, #81aea7, #c7dad6);

/* Safari 4-5, Chrome 1-9 */
background-image: -webkit-gradient(
linear,left bottom,left top,
color-stop(0.5, rgb(0,98,83)),
color-stop(0.99, rgb(199,218,214))
);

/* Safari 5.1+, Chrome 10+ */
background: -webkit-linear-gradient(bottom, #006353, #c7dad6);

/*Mozilla/Gecko (Firefox >= 3.6 etc) */
background: -moz-linear-gradient(
center bottom,
rgb(0,98,83) 50%,
rgb(0,113,94) 50%,
rgb(199,218,214) 99%
);

/* Opera 11.10+ */
background: -o-linear-gradient(bottom, #006353, #00715e, #c7dad6);

/*IE 5.5 – 7*/
filter: progid:DXImageTransform.Microsoft.Gradient(StartColorStr=’#006353′, EndColorStr=’#c7dad6′, GradientType=0);

/*IE 8+*/
-msfilter:”progid:DXImageTransform.Microsoft.gradient
(startColorStr=’#81aea7′, EndColorStr=’#81aea7′)”

You could add even one more exception, for a while Opera used an external svg to create the gradient, but the work is not worth.


So many lines that makes me nostalgic about the old way to do it, that now can be used as fallback in emergency:

/* fallback, Opera <=10 */
background-color: #1a82f7;
background: url(images/linear_bg_2.png);
background-repeat: repeat-x;


Linkography
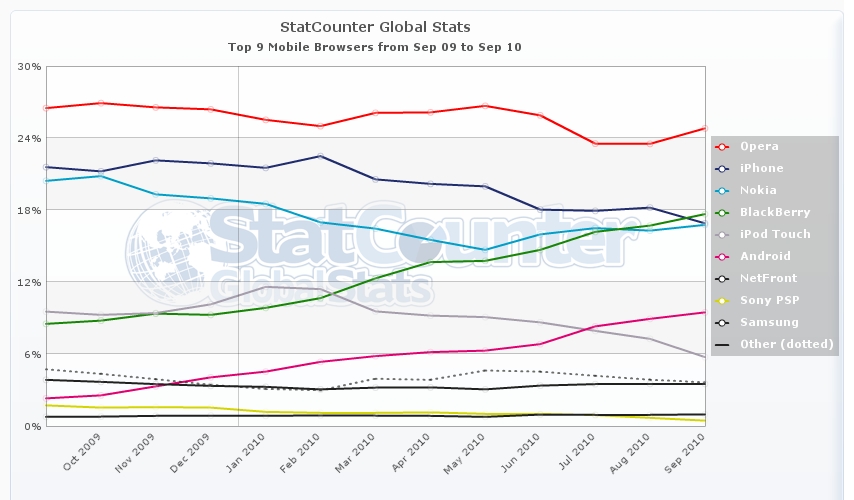
mobile browser counter

http://gs.statcounter.com/#os-ww-monthly-201004-201104

http://en.wikipedia.org/wiki/Usage_share_of_web_browsers

http://en.wikipedia.org/wiki/Mobile_browser

thanks for the great work:
http://www.normansblog.de/demos/browser-support-checklist-css3
MirrorBot Video – Moving Projections Controller Interface

comments Comments Off on MirrorBot Video – Moving Projections Controller Interface
By , January 5, 2011 17:58

YouTube Preview Image

Part #02 of the MirrorBot Demo Video


** Video Installation Audio Visual Special Event n8 @Tacheles 17.12.2010

** Details of the Controller device:

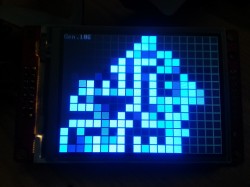
  • Programs and Live Mode LCD screen interface

Part #01 of the Video, Installation in MIKZ, Berlin 03.2010: /2011/01/03/mirrorbot-video-moving-projections-in-action

Technical details: lab.synoptx.net/mirrorbot

MirrorBot Video – Moving Projections in Action

By , January 3, 2011 02:03
YouTube Preview Image

Demo Video of the “moving projection” video installation at Suchtfaktor elekto party in MIKZ, Berlin 03.2010
Monthly, every 1. saturday, also in 2011!

The “MirrorBot” is a Arduino minicomputer system to control the position of videobeamer projections. Two servomotors move a mirror in X- and Y- axis, which reflects the beamer image. The servos are controlled by a micro-controller with an LCD. It can play various movement pattern programs automatically, adjusted to the music speed by setting BPM or ‘live’ with the joystick and button.

Headsquatter VJs use it to move visuals around the whole dance floor when playing in clubs. Moving projections become a live instrument! 😀

more info in older posts :

lab.synoptx.net/2010/03/13/mirrorbot-v3-in-action

Music by droidsystem.com many ThanX!!

Video: PONGuino – Arduino & S65 Shield – 2 Player MiniGame

comments Comments Off on Video: PONGuino – Arduino & S65 Shield – 2 Player MiniGame
By , December 27, 2010 04:55
YouTube Preview Image

Here is a video about the PONGuino game for 2 players on a minicomputer with mobile-phone display and joysticks.
The box contains an Arduino 2009, a S65-LCD Shield and a gamepad from an old playstation 1. It runs autonomous on 9V battery.

The device is originally built for the “Mirrorbot” moving projection system [ lab.synoptx.net/mirrorbot ], but the pong-game-code from www.codetorment.com was perfect to test the LCD and – really – it’s fun to play!

The system is just fast enough to play a game, but you have to take care, how many pixels and how fast you draw. There is no double buffering and just a serial line between arduino and screen……

more info in this post from 02.2010

Sorry for the low quality photo-cam recording.
The LCD is not bad in reality: You don’t see the pixels and the scratches are only on a transparent folie..


Arduino Workshop “Hardware 2 Software Interaction” Level #01

comments Comments Off on Arduino Workshop “Hardware 2 Software Interaction” Level #01
By , October 5, 2010 19:21

15.11.2010 @ nerdcafe FHain LUG    nerdcafe.vetomat.net

Workshop Info

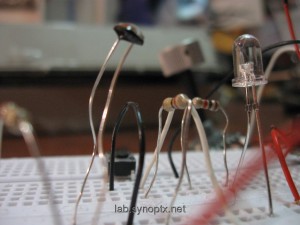
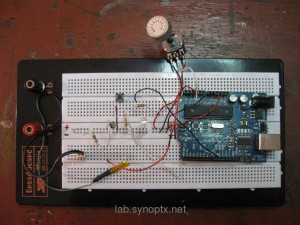
Sensor forest on a breadboard

Hardware Hacking -DiY — Introduction to Hardware <-> Software Interaction

This introduction is intended for anyone interested in (easy) electronics hardware and (mostly easy) software coding. Artists / *Designers & Hackers of all kinds are invited to join the FREE sessions in Berlin Friedrichshain.

TKilla will introduce the Arduino micro-controller platform and show some practical examples. Basics of electronics and some interesting components will be explained shortly, but there are no tricky mechanical works and no soldering involved.

We will focus on software programming inside the Arduino editor to show how to read analog values from various interesting sensors and output to LEDs and maybe servo motors.

Big breadboard, many sensors + Arduino

To get some interesting visual results, we will use Processing to display incoming values from sensors in graphical ways.

After the lesson, you should have an idea how to design & build your own simple robots (servo motors…) or sensory controllers (MIDI / OSC faderboxes,..).

If there is time, everyone can install the software and try with a board and sensors. We can focus on special topics and the workshop part (maybe MIDI Controllers) in a follow-up evening.

Synoptx Crew organizes all material, tools and a nice location.

Max. 5 Arduino boards will be available, so bring your own, if you have one or contact us by mail or comment..

BYO laptop!

and interesting electronics (sensors) to recycle! (old joysticks, buttons, potis, faders, sensors,…)

Amarok Remote for Android

By , August 28, 2010 22:08

What a great tool!

Amarok Remote Screenshot

Amarok Remote Screenshot

This amarok plugin + Android App lets you control Amarok Mediaplayer over WLAn / …

I just wanted to start to code, but typed amarok into the market and: somebody did it already

Android Amarok Remote Homepage

just follow the install instructions – its done in 5 minutes, enjoy!

BugFIX:

rename the downloaded file to android.amarokscript.tar.gz or you cannot open it in amarok plugin manager!

WordPress Open Source Blog System
SynOptX Lab Theme