At first I was very disappointed, because my new Raspis showed only 256MB RAM, although the shop promised to deliver the new model with 512MB RAM.
Mr. Watterott answered my email- support request within 5 minutes (!). He told me, that it’s a software issue and pointed me to this link, showing how to identify, if the SoC has 512MB of memory: www.raspberrypi.org/archives/2191
Luckily my boards have a chip with “4G” in the model number 🙂
Shortly after that, I found out, that a new firmware already exists: www.raspberrypi.org/archives/2180
“Update: Those of you lucky enough to receive a 512MB Pi this morning can download updated firmware here. For example, download arm384_start.elf and rename it to start.elf on /boot partition. You will then have a 384M/128M memory split.“
Replacing the /boot/start.elf on the SD-card did the trick 😀
Thanks to Dominique Gallot and vis, I managed to drive a MI0283QT-2 color touchscreen on the raspi 🙂
I followed the steps at www.gallot.be/?p=197 and added the framebuffer driver by vis to run X and LXDE-desktop. 40px in vertical are missing and touch is not working yet, but it’s very funny to use a mouse on the mini-screen.
Dominique Gallot’s howto is very accurate, so these are just additional notes to avoid a few catches I noticed:
- Install debian – the Chris boot kernel was not required – the module spidev is already included in the latest debian image
- Put this line into /etc/modules:
modprobe spidev bufsiz=256000
- Install wiringPi https://projects.drogon.net/raspberry-pi/wiringpi/download-and-install/
- Download and compile
MI0283QT2-pi
- Download the framebuffer driver by vis: https://snr.freifunk.net/trac/vis/browser/raspberrypi/fb.cpp into a subfolder on the same level as MI0283QT2/ and compile it with:
gcc -lstdc++ -iquote ../MI0283QT2 fb.cpp ../MI0283QT2/MI0283QT2.cpp ../MI0283QT2/font*.c -o fb
- Put https://snr.freifunk.net/trac/vis/browser/raspberrypi/10-monitors.conf into /usr/share/X11/xorg.conf.d to set X server resolution to 320×200 px
- Unplug HDMI ( / DVI adapter)
- Move all USB devices to a powered hub
- Use a stroooong 5V usb power supply – a 1000 mAh smartphone plug was not enough
- Run these commands from a terminal connected via SSH as root:
gpio load spi
gpio -g mode 18 pwm
gpio -g pwm 18 1000
./fb
start the x-server in a second console:
startx
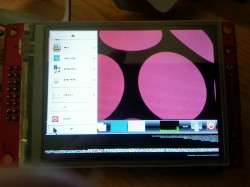
As you can see in the pictures, the startmenu of LXDE is not really readable and the terminal- fonts are too small, but I’m sure to find some nice applications for this setup.
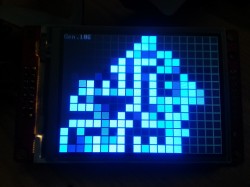
The gameoflife demo runs very well: its fast and stable. It uses 30-34% CPU
-
-
gameoflife demo
-
-
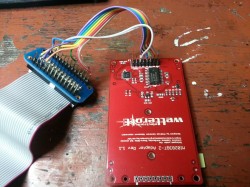
Experimental touchscreen and Raspi connection with adafruit raspi header
-
-
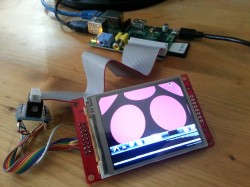
Experimental touchscreen and Raspi setup
-
-
LXDE on the touchscreen
Building instructions
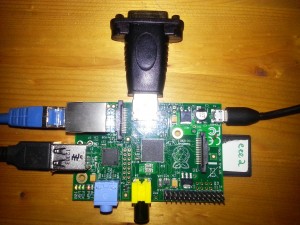
Today I received 2 Raspberry Pi boards from watterott.com – Thanx for the fast delivery!
Specs: www.watterott.com/de/Raspberry-Pi-Model-B
During installation and configuration some bugs appeared, so here are some notes to get around:
I used this debian wheezy image: www.raspberrypi.org/downloads
and followed the linux console install guide elinux.org/RPi_Easy_SD_Card_Setup
At first various problems occurred: locale- and keyboard- config did not work in raspi-config, apt-get dist-upgrade failed to install libgcc1, …
so I changed the dd command to blocksize 1MB and re-installed the SD-card:
dd bs=1M if=~/2012-09-18-wheezy-raspbian.img of=/dev/sdX
Those problems did not disappeared, instead:
- HDMI to DVI-D(igital) adapter works instantly
- USB-keyboard and mouse work instantly
- 1000mAH 5V adapter is strong enough to power the board with keyboard LAN and DVI connected
- apt-get dist-upgrade works
- locale- and keyboard- config works in raspi-config
- LXDE desktop works
- network and ssh-daemon up and running
Installation of some basic tools:
apt-get install mc screen rcconf tmux
Moving on to some multimedia stuff, I found alsa and sound- modules correctly installed, so I added:
apt-get install mplayer vlc
work in progress…
Raspberry Pi setup


