Posts tagged: Hardware

Nomads USB-Zine 2012

comments Comments Off on Nomads USB-Zine 2012
By , October 20, 2013 19:07
Building Up the first Nomads USB-Zine

The Nomads USB-zine is a mixture of brochure, videos and info material that become a multimedia Fanzine on USB stick media.

With the USB-zines we can distribute our info material on demand,  decreasing the consume of media support as DVD or Paper to promote our ideas.

We organized a standard version with a selection of our production, or we refill the USB following specific request from the people, in a Live Peer to Peer sharing moment.

Author: Nomads Guinee Zbog

Compatibility

Working on universal standard to let the project run on every platform, Linux, Windows and Mac.

As Nomads we work with open source softwares on all platforms at the same time,  I generate all the files on Linux platform, also when exported in commercial file format like .pdf and .ppt

The first idea was to let self-open a menu file with listed all the content, but normally the Hacker community suggest to use not the autorun and dont encourage the market to use it, because anyway the autorun will be blocked from any good protected system.

So we plan a FAT32 partition, on the USB sticks,  the mostly compatible file system to work on different OS platform.

Afterlife (of the fanzine USB stick)

It’s an eco-friendly choise not only because on the USB fits different formats at the same time, after u read or copy our fanzine files out of it, you will reuse the same media for your daily life, and that’s a pretty smart way to reduce the production impact!

We really appreciate the USB live systems build up for security so we do encourage the usage of those Operative systems Debian based to let run a live system on USB stick:

Linux Light —– Security (Deutsch)

Freepto —— Cript or die (Italiano)

Tails —— Security (English)

Enable 512MB RAM on latest Raspberry Pi

comments Comments Off on Enable 512MB RAM on latest Raspberry Pi
By , October 19, 2012 20:20

At first I was very disappointed, because my new Raspis showed only 256MB RAM, although the shop promised to deliver the new model with 512MB RAM.

Mr. Watterott answered my email- support request within 5 minutes (!). He told me, that it’s a software issue and pointed me to this link, showing how to identify, if the SoC has 512MB of memory: www.raspberrypi.org/archives/2191

Luckily my boards have a chip with “4G” in the model number 🙂

Shortly after that, I found out, that a new firmware already exists:  www.raspberrypi.org/archives/2180

Update: Those of you lucky enough to receive a 512MB Pi this morning can download updated firmware here. For example, download arm384_start.elf and rename it to start.elf on /boot partition. You will then have a 384M/128M memory split.

Replacing the /boot/start.elf on the SD-card did the trick 😀

Rasperry Pi SPI Touchscreen X-Server

comments Comments Off on Rasperry Pi SPI Touchscreen X-Server
By , October 19, 2012 19:37

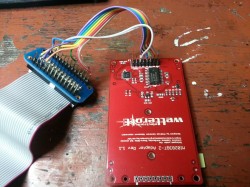
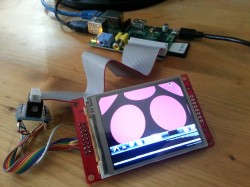
Thanks to Dominique Gallot and vis, I managed to drive a MI0283QT-2 color touchscreen on the raspi 🙂

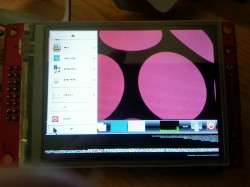
I followed the steps at www.gallot.be/?p=197 and added the framebuffer driver by vis to run X and LXDE-desktop. 40px in vertical are missing and touch is not working yet, but it’s very funny to use a mouse on the mini-screen.

Dominique Gallot’s howto is very accurate, so these are just additional notes to avoid a few catches I noticed:

  1. Install debian –  the Chris boot kernel was not required – the module spidev is already included in the latest debian image
  2. Put this line into /etc/modules:  modprobe spidev bufsiz=256000
  3. Install wiringPi https://projects.drogon.net/raspberry-pi/wiringpi/download-and-install/
  4. Download and compile MI0283QT2-pi
  5. Download the framebuffer driver by vis: https://snr.freifunk.net/trac/vis/browser/raspberrypi/fb.cpp into a subfolder on the same level as MI0283QT2/ and compile it with:                         gcc -lstdc++ -iquote ../MI0283QT2 fb.cpp ../MI0283QT2/MI0283QT2.cpp ../MI0283QT2/font*.c -o fb
  6. Put https://snr.freifunk.net/trac/vis/browser/raspberrypi/10-monitors.conf into /usr/share/X11/xorg.conf.d to set X server resolution to 320×200 px
  7. Unplug HDMI ( / DVI adapter)
  8. Move all USB devices to a powered hub
  9. Use a stroooong 5V usb power supply – a 1000 mAh smartphone plug was not enough
  10. Run these commands from a terminal connected via SSH as root:
gpio load spi
gpio -g mode 18 pwm
gpio -g pwm 18 1000
./fb

start the x-server in a second console:

startx

As you can see in the pictures, the startmenu of LXDE is not really readable and the terminal- fonts are too small, but I’m sure to find some nice applications for this setup.

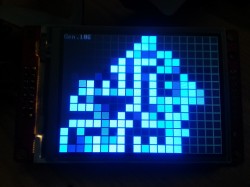
The gameoflife demo runs very well: its fast and stable. It uses 30-34% CPU

Building instructions

Raspberry Pi Initialization

comments Comments Off on Raspberry Pi Initialization
By , October 18, 2012 20:21

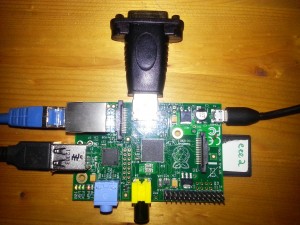
Today I received 2 Raspberry Pi boards from watterott.com – Thanx for the fast delivery!

Specs: www.watterott.com/de/Raspberry-Pi-Model-B

During installation and configuration some bugs appeared, so here are some notes to get around:

I used this debian wheezy image: www.raspberrypi.org/downloads

and followed the linux console install guide elinux.org/RPi_Easy_SD_Card_Setup

At first various problems occurred: locale- and keyboard- config did not work in raspi-config, apt-get dist-upgrade failed to install libgcc1, …

so I changed the dd command to blocksize 1MB and re-installed the SD-card:

dd bs=1M if=~/2012-09-18-wheezy-raspbian.img of=/dev/sdX

Those problems did not disappeared, instead:

  • HDMI to DVI-D(igital) adapter works instantly
  • USB-keyboard and mouse work instantly
  • 1000mAH 5V adapter is strong enough to power the board with keyboard LAN and DVI connected
  • apt-get dist-upgrade works
  • locale- and keyboard- config works in raspi-config
  • LXDE desktop works
  • network and ssh-daemon up and running

Installation of some basic tools:

apt-get install mc screen rcconf tmux

Moving on to some multimedia stuff, I found alsa and sound- modules correctly installed, so I added:

apt-get install mplayer vlc

work in progress…

Raspberry Pi setup

Raspberry Pi setup

Arduino + Touchscreen!

comments Comments Off on Arduino + Touchscreen!
By , June 27, 2012 19:41

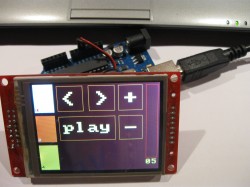
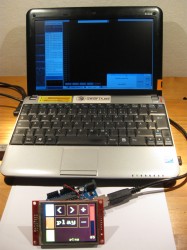
The arduino touchscreen shield by watterott.com :: URL? is great fun. TKilla built:

  • MIDI Controller for VJing and Audio-Studio
  • PONGuino-touch – 2 player touchscreen game
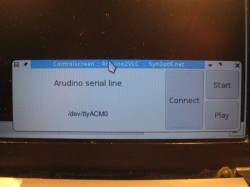
  • PC remote control with mouse- and keyboard- econtrol, VLC mediaplayer control,…
  • various tests/demos

Infos, Code, Videos & more pictures coming soon

MirrorBot Video – Moving Projections Controller Interface

comments Comments Off on MirrorBot Video – Moving Projections Controller Interface
By , January 5, 2011 17:58

YouTube Preview Image

Part #02 of the MirrorBot Demo Video


** Video Installation Audio Visual Special Event n8 @Tacheles 17.12.2010

** Details of the Controller device:

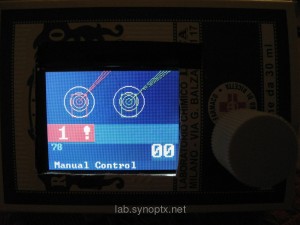
  • Programs and Live Mode LCD screen interface

Part #01 of the Video, Installation in MIKZ, Berlin 03.2010: /2011/01/03/mirrorbot-video-moving-projections-in-action

Technical details: lab.synoptx.net/mirrorbot

Video: PONGuino – Arduino & S65 Shield – 2 Player MiniGame

comments Comments Off on Video: PONGuino – Arduino & S65 Shield – 2 Player MiniGame
By , December 27, 2010 04:55
YouTube Preview Image

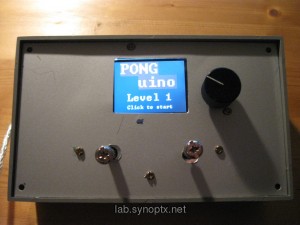
Here is a video about the PONGuino game for 2 players on a minicomputer with mobile-phone display and joysticks.
The box contains an Arduino 2009, a S65-LCD Shield and a gamepad from an old playstation 1. It runs autonomous on 9V battery.

The device is originally built for the “Mirrorbot” moving projection system [ lab.synoptx.net/mirrorbot ], but the pong-game-code from www.codetorment.com was perfect to test the LCD and – really – it’s fun to play!

The system is just fast enough to play a game, but you have to take care, how many pixels and how fast you draw. There is no double buffering and just a serial line between arduino and screen……

more info in this post from 02.2010

Sorry for the low quality photo-cam recording.
The LCD is not bad in reality: You don’t see the pixels and the scratches are only on a transparent folie..


PONGuino – Arduino & S65 Shield – 2 Player MiniGame

By , February 12, 2010 19:36
PONGuino game on the MirrorBot v3 Hardware

PONGuino game on the MirrorBot v3 Hardware

I wanted a playable game to show the possibilities of the Arduino plattform in  workshops. Since I already have a S65-Shield built in a box with two joysticks, I wanted to use that MirrorBot hardware for presentation.

The most funny code I could find for the S65 Shield was a Pong game by

www.codetorment.com

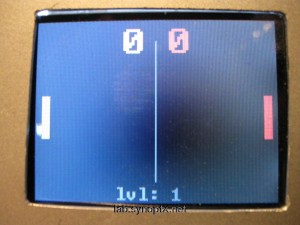
This mod uses one axis of two joysticks – or two potis connected to input pins to move the two bats of the two players up and down.

The AI and encoder codes were removed and replaced by a similar check:

PONGuino 2 players in action

PONGuino 2 players in action

If the joystick potis are moved up or down, they decrease or increase the y position value of the matching bat.

If you have a s65 shield and would like to run this code, you could connect two potis to input pins (e.g. 0,1) and try those. Thes bats ‘should’ move, if you move the pots out of the center position.

I included a veeery simple level system:

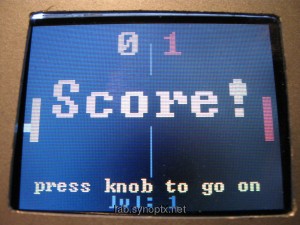
PONGuino someone got a point +

PONGuino someone got a point +

After each round a level int variable gets increased. This level var decreases a delay() (starting at 10 ms)  in the main loop  -that way, so the game gets faster, the more rounds you play ( 5 times).

🙂

….

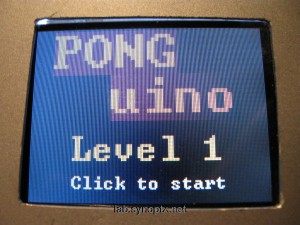
PONGuino mini-game intro screen

PONGuino game intro screen

Continue reading 'PONGuino – Arduino & S65 Shield – 2 Player MiniGame'»

Arduino Workshop in Berlin

comments Comments Off on Arduino Workshop in Berlin
By , February 8, 2010 01:50
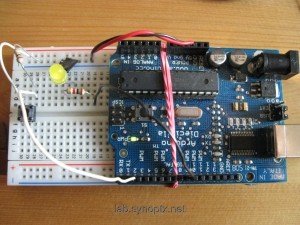
breadboard with Arduino backpack

prototyping breadboard with Arduino backpack

On 28.1.2010 we had our first workshop to introduce the Arduino Microcontroller plattform in Berlin, FHain.

The session took place in Sama32 cafe and there were ~10 nerds, who were interested in micro-controllers and electronics. We presented some hardware and sketches and introduced the connection from arduino inputs to processing sketches.

Thanx to Todbot for the possibility to use his excellent slides!

Who is interested to join the next workshop?

Workshop Info

Shields up! Grafix & Color LCD Fun .: S65-Shield

By , January 8, 2010 22:41
S65 Shield italian nosespray pappcarton prototype

S65 Shield italian nosespray pappcarton prototype

We ordered a S65 Arduino shield from Watterott.com.

Simply plug it on a Arduino and play with  a 176 x 132 pixels color display from a Siemens S65 handy, micro SD card slot and rotary encoder.

There is a library on the Watterott website, which contains some graphic functions to paint on the screen, just like in many other languages. This is enough to create small games, animations and GUIs  in full color.

The refresh rate is not soo high, but its fast enough to paint moving objects and interactive animations. The painted pixels stay as they are until something else is drawn over – they do not need to be refreshed.

Testing to paint circles + lines and text on the s65 shield

Testing to paint circles + lines and text

Instead, the screen must be completely cleared before redraw, which is veeeery slow or parts of the screen must be painted over with the background color.

After some experiments, I call the painting functions two times: 1. with the background-color – to overwrite exactly the previously painted lines with the background color, before re-painting moved objects. This approach works fast and the refresh is invisible.

WordPress Open Source Blog System
SynOptX Lab Theme